It's over...now what?
Here are a few idea's of things I done with wedding items now that the wedding is over.
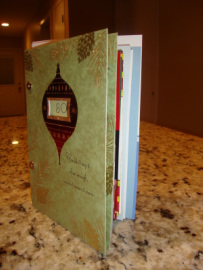
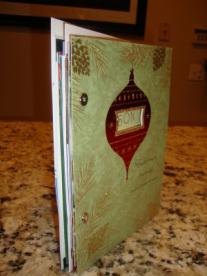
Card Book
I had seen a few ideas posted on TK for creating books from wedding greeting cards and loved the idea of preserving this (especially since some many of them made me cry and really hit home with me that "OMG, we're married!"). The two links I book marked were for a glue-bound book (http://offbeatbride.com/2010/01/diy-wedding-card-keepsake-book) and a spiral-ringed book (http://thecreativeplace.blogspot.com/2010/01/tuesday-tutorial-christmas-card-saver.html).
I love the looks of the first one, but after talking to clerks at both Michaels and Paper Source, I decided it that over time the glue would probably wear off and the cards would fall out. For the spiral rings, while it seems practical enough, I just didn't like the looks of the rings themselves. However, someone at Paper Source recommended another idea -- scrapbooking posts! (Of course she also wanted to sell me a $60 hole punch, but I knew my savyness would lead me to a cheaper option). Thus, the directions below:
I love the looks of the first one, but after talking to clerks at both Michaels and Paper Source, I decided it that over time the glue would probably wear off and the cards would fall out. For the spiral rings, while it seems practical enough, I just didn't like the looks of the rings themselves. However, someone at Paper Source recommended another idea -- scrapbooking posts! (Of course she also wanted to sell me a $60 hole punch, but I knew my savyness would lead me to a cheaper option). Thus, the directions below:
|
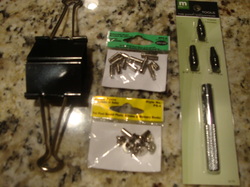
Supplies:
· Clips or clamps (left in picture, I used 2 binder clamps I already owned) · Scrapbooking/book making posts (center bottom w/yellow package, $2.49 at Michaels) · Post extenders (center top w/green package, $2.49 at Michaels) · Paper “drill” (right, has 3 different size attachments (black) that screw into handle (silver), $4.99 at Michaels) · Cards (as you can see I made this trial with our holiday cards, we had about 25 of all types) · Hammer |
 Supplies |
|
Directions:
1. Sort through cards Find the 2 largest cards and choose one to be the front and one to be the back. 2. Pile and align cards If possible try to stack cards so that the bottom left corners are on top of each other (this will allow the bottom to stand up evenly by itself). For cards that are a lot shorter, center them based on the front card’s height. This will help to ensure that the card will be hole-punched and have the posts go through it to keep it attached. 3. Clamp cards You may have to this one pile at a time. The pile should only be as tall as the black drill “bit”, otherwise it won’t get drilled. 4. Attach drill bit to drill. The drill bit size should be as big (if not a little bigger) as your posts to make sure the post can fit through the hole. 5. Place drill over desired spot and hammer until drill goes through all cards. The height/size of your cards will determine the placement of the holes. The farther to the left you make the holes, the easier it will be to read your book. Repeat until all of your cards have holes punched. 6. Take the scrapbooking posts (2) with the tube end (not the screw end) and place your card’s holes through the posts. Depending on how many cards you have, you make to need to add the post extenders. Add as many as you need but make sure they’re equal. The post extenders just screw into the scrapbooking post. 7. Attached the screw-end post into the tube. Twist until secure and viola, your book! Variations:
I plan on using all of these ideas for my wedding card book: · Crease for easier reading: You can use a boning tool to create a crease in each card so that it’s easier to read each card. Boning tool can be purchased as places like Michael’s, Joanne, and Paper Source ($8.95 at Paper Source). Do this before any of the steps above. To create the crease, decide how far from the left you want the crease (make sure you’ll have enough room to fit the posts). Place a ruler at the spot you want the crease and run the boning tool along the ruler. Do this for all cards (make sure to use the same distance from the left of the card). · Covers: Cut paper to size of front and back cards. Decorate as desired and drill holes using method above. I plan on using paper in our wedding colors and making a cute cover saying something like “Well wishes and love from our family and friends – Our Wedding Cards”. · Spine: One of the things I love about the first book link about is the spine. I plan on adding one to my book simply by cutting a rectangular piece of paper to fit the side of my paper (a little bigger so that I have enough to wrap around to the front and back covers and gluing) |
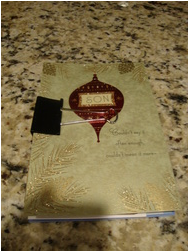 After Step 3 - Cards are aligned and clamped 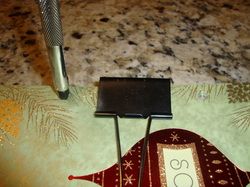 After Step 5 - Drill in location, ready to hammer (hole on right already complete) 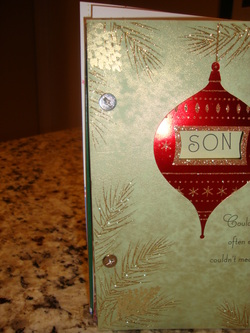 Close-up of final product |
 |
 |
Frame or Shadowbox
With so many keepsakes from the big event (and an empty hallway wall), I decided I wanted to create a collage of different frames to display some of our wedding related items (I'll post a picture once they're all hung together).
|
This is the collar Ben had on our dog (along with my ring) to propose. Right after getting engaged, I knew I wanted this in a shadowbox type frame. I went to both Joanne's and Michaels to see about custom framing. Both places told me that for what I wanted (the collar and a 5x7 picture), it'd be about $300+. Even with a coupon, I decided want to pay $150+ for something so simple.
Even though it took about a year and a half after the proposal, I finally framed it myself, for about $12!! I found the frame for $10 at Joanne's (after coupon). It actually is supposed to sit with the picture vertical instead of horizontal and the smaller "window" is for a graduation tassel. After some brown scrapbook paper and useing some Zips glue strips (left over from making invitations), everything is safe and secured to sit horizontally. I'm so proud of this project! |
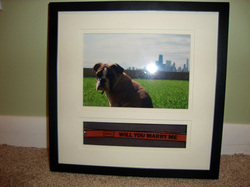 The proposal collar and picture taken from spot it happened |
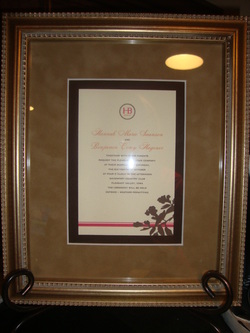 This was actually the gift from the hostess of one of my bridal showers. I was actually planning on doing this but thankful that she saved me the money. She had it custom framed at Michaels and I found the frame holder (bronze in bottom of picture) at Homegoods for $4.
|
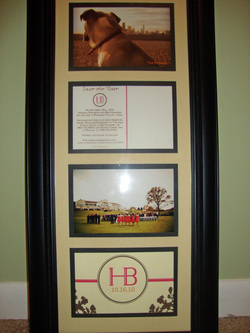 The first two top pictures in the frame are the front and back of our save the date. The first is a picture taken during the ceremony and the bottom is the back of our RSVP postcard.
|
Photobooks
Obviously we had a lot of our pictures printed and framed, but with so many, there was no way we could frame all of our favorites. So the next alternative was photobooks! I've used Picaboo, Shutterfly and Snapfish to make photobooks. IMO, the order I've listed them is who had the best quality to worst quality. Even though Picaboo is more expensive, it's worth it. Also, Picaboo has been offering a lot of $35 Groupon's for $100 credit. It can't be combined with other promotions, but it still a great deal.
Here are a few photobooks I made (for us and as gifts):
Engagement Pictures (free from Shutterfly): http://share.shutterfly.com/action/welcome?sid=0Cas2rhy4Zs3MQ
Grandparents (Christmas present): http://www5.snapfish.com/snapfish/projectshareewelcome/l=2474173025/p=42201295572653786/g=292988025/cobrandOid=1000/COBRAND_NAME=snapfish/otsc=SYE/otsi=SPBKlink/
Flower girl and ring bearer (Christmas present): http://www5.snapfish.com/snapfish/projectshareewelcome/l=2474175025/p=546201295574484675/g=292988025/cobrandOid=1000/COBRAND_NAME=snapfish/otsc=SYE/otsi=SPBKlink/
Still need to Start:
I have just a few things left that I either haven't started or need to complete:
-Our wedding album (Started when I made Picaboo books for our parents, but haven't finished yet)
-Caketopper shadow box: Someone suggested cutting off the legs of the cake topper and putting it in a shadow box. Since I custom made our topper, it has even more meaning to me and I love this idea of keeping it.
