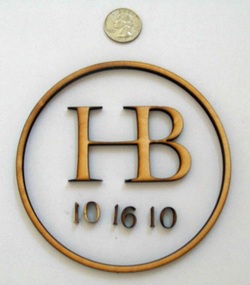
Our LogoAs with our cake topper, I wanted to avoid using a main "H" anywhere since Hannah also starts with "H". Another consideration was that etiquette-wise, a monogram with the bride and grooms first initials and the new last name technically should not but used until the reception (when the couple is legally wed").
So I started messing around with text boxes, fonts, shapes, and colors in Microsoft Word and our logo was "born". The "HB" is "Castellar" font and the date is "Algerian". Note: whenever you're moving text boxes, shapes, pics, etc in Microsoft Office products, if you hold down "Ctrl" while using the arrow keys to move the object, you can get very precise with your positioning. This was key for making the logo! |
 We used the logo all over:
|
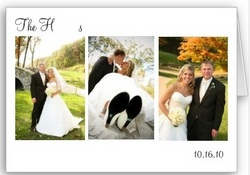
Save-the-DatesWe opted for Save-the-Date postcards (STDs), simply because they're still cute, but very inexpensive.
We decided to incorporate Oscar, since that's how Ben proposed. For those who weren't aware of the proposal story, they were probably a bit confused as to why there is the back of a dog's head on the card, but to us (and those who knew the story) it held a special meaning. I ordered the STDs from 123print.com ($22 for 100, including shipping). This was before I was familiar with Vista Print and having the knowledge I have now, I would have used Vista Print and also think I could have made a better design, but oh well. In the scheme of things, it's really insignificant! I handwrote the names and addresses with a brown fine point marker. |
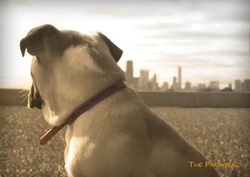 Front of Postcard 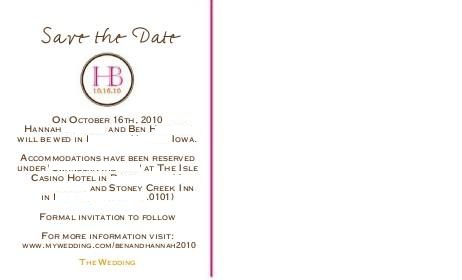 Back of Postcard |
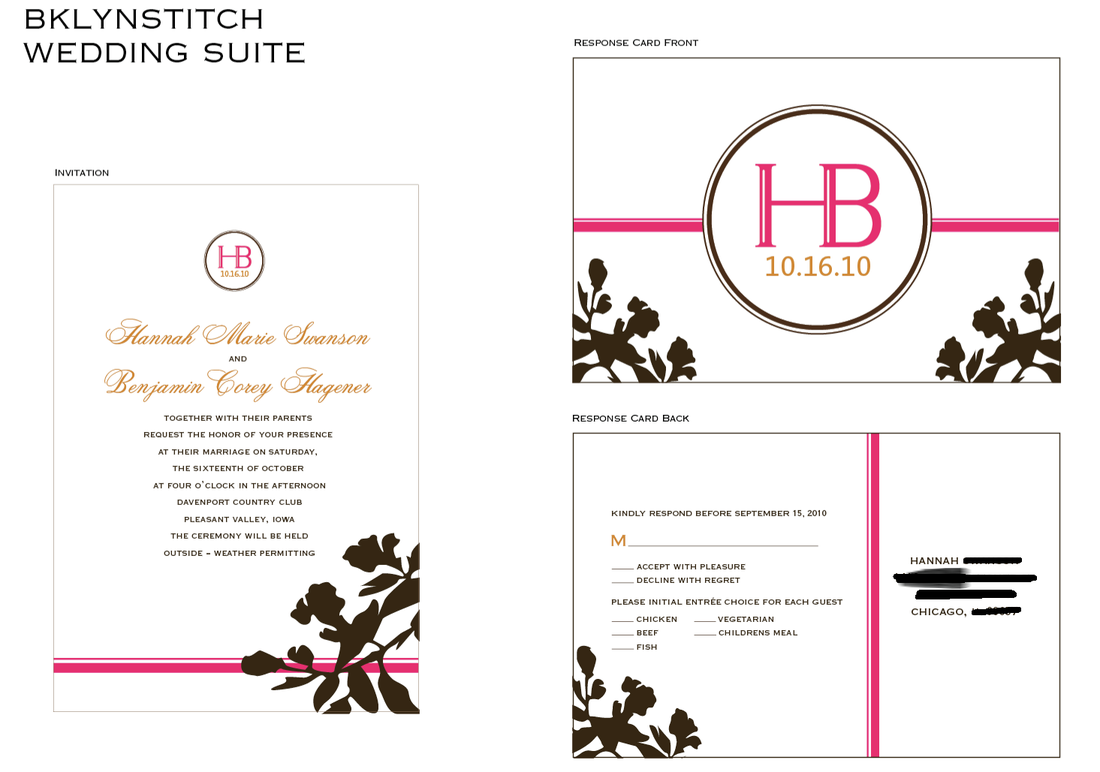
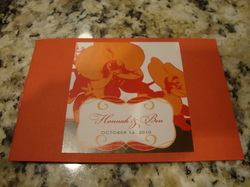
InvitationsEarly on in the engagement (actually the day of our first session for engagement pictures) I dragged Ben with me to a bridal show at Navy Pier. Besides getting a bunch of junk emails, I did find one thing useful, I found an invite design I loved (called a Kangaroo Pocket)! The problem: no one in the QCA had it. Watermark offered to make it for me, but at $8 per invite, it just wasn't in my budget, so I decided to make my own.
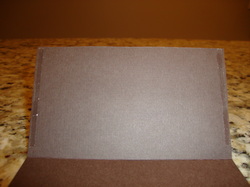
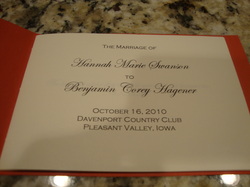
What I wanted: -5"x7" kangaroo pocket invite -Main Invite (on front): 4"x6" (so half inch of pocket showed all around as a border) -Reception/Accommodations Card: 4"x6-3/4" high -Reception/brunch invite insert: 4"x6-1/2" high -RSVP postcard: 4"x6" high After debating about how to do the design and printing, I decided to post an alchelmy on etsy.com and after receiving a number of bids and doing some investigating, I decided on a young woman from New York (perhaps it's my love for NYC that drew me to her). More or less we decided on a price and then spent about 4 months emailing designs back and forth. Evenutally we came up with a design we both loved. She printed one sample and sent it to me, we made some adjusts and then she did the printing. (If you're interested in her esty.com contact info, please let me know) In the meantime, my mom and I got to work on making to pocket itself. I also decided to line my envelopes to give them something extra and pull everything together. Even with 3 inserts, a liner and pocket, we got away with $0.44 postage!  Front of invite |
Pictures from the esty designer (click on them for larger view):
 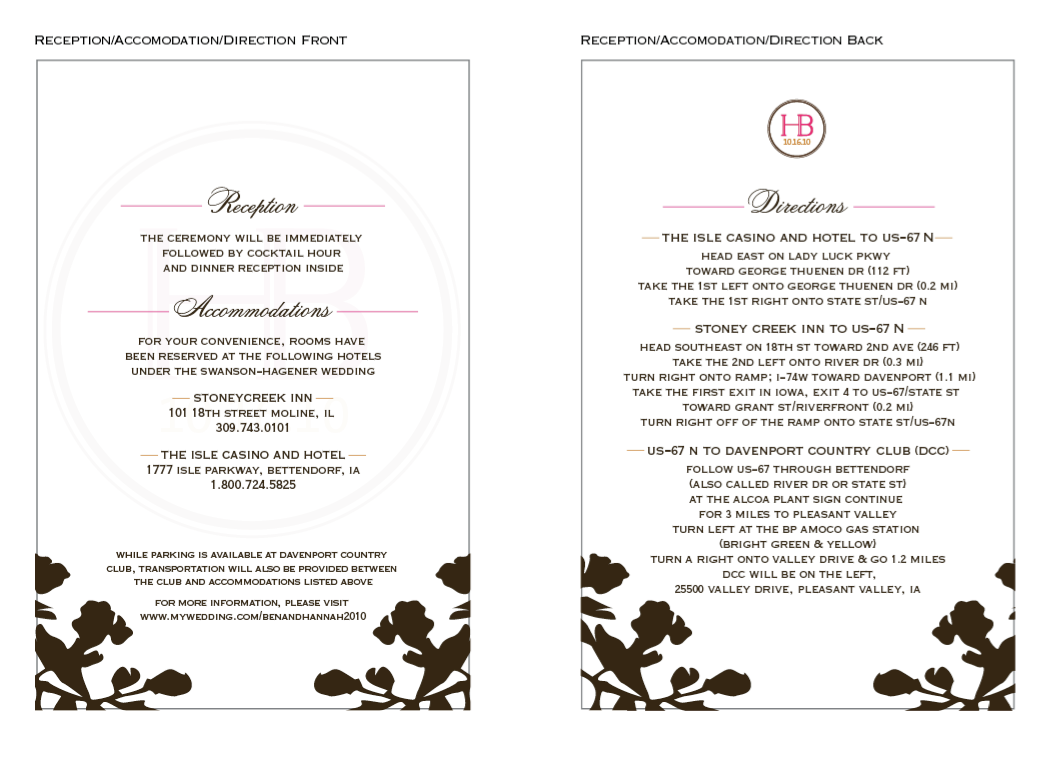 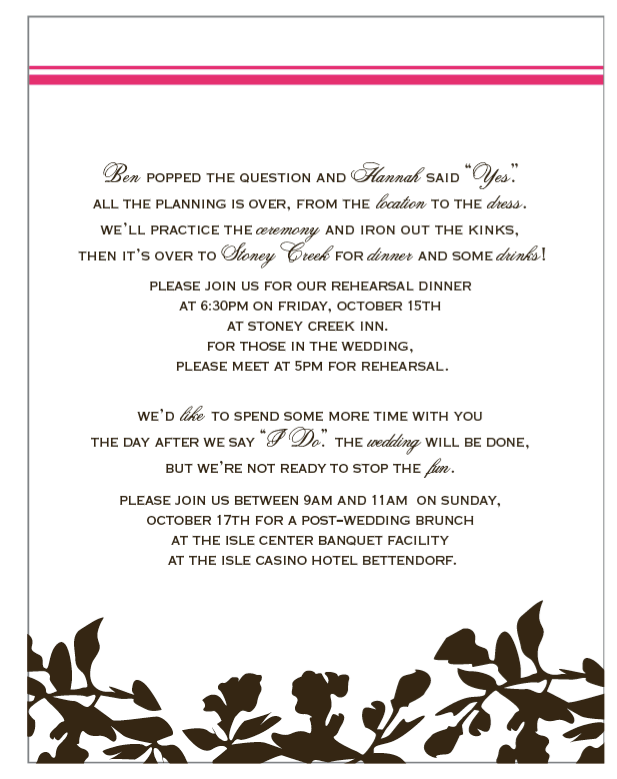 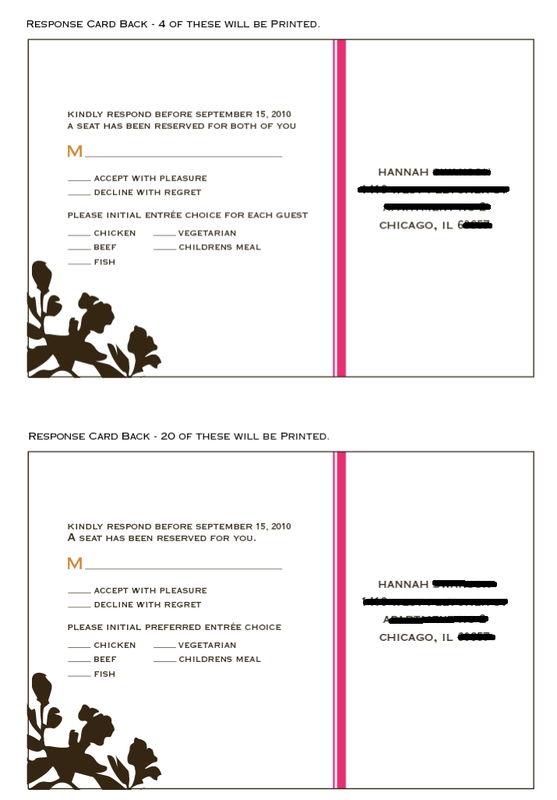  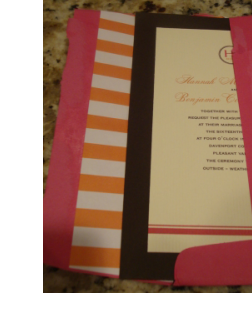 Our invite with DIY envelope liner 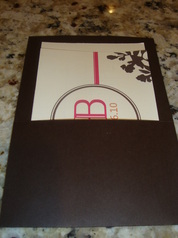 Back of invite (This one has 2 inserts; some had 3 with the third insert being the invite for rehearsal dinner and post-wedding brunch) |
Kangaroo Pocket Instructions:
Supplies Needed:
- Cardstock: I used 80# 11"x17" paper (from lcipaper.com)
-Piece of scrap paper, 8.5"x11"
-Ruler
-Scissors/paper cutter
-Boning tool (if not a butter knife will do)
-"Zips" glue strips - 1/8" wide (Zips is the brand)
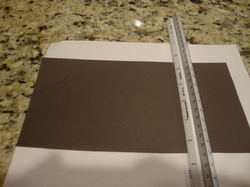
1. Cut paper into 5"x10" pieces. (With the 11"x17" paper, I was able to get 3-5"x10" pieces with some excess scraps -I used those scraps for my escort cards; see below-)
Supplies Needed:
- Cardstock: I used 80# 11"x17" paper (from lcipaper.com)
-Piece of scrap paper, 8.5"x11"
-Ruler
-Scissors/paper cutter
-Boning tool (if not a butter knife will do)
-"Zips" glue strips - 1/8" wide (Zips is the brand)
1. Cut paper into 5"x10" pieces. (With the 11"x17" paper, I was able to get 3-5"x10" pieces with some excess scraps -I used those scraps for my escort cards; see below-)
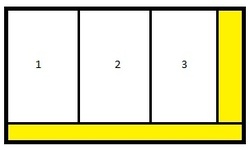 How to cut 11'x17' paper. The numbered segments are the 5'x10' invite pieces and yellow blocks are scrap that I used for escort cards. |
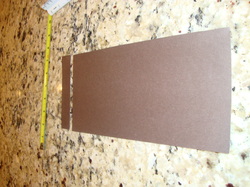 Step 1
(The strip to the left was used for my escort cards) |
2. On a piece of
standard from one edge measure 7" and make a mark. Do this on 2 or 3
spots from the paper and connect the marks so that you have a line, 7"
from one end of the paper.
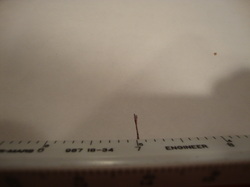
Step 2
3. Line up your 5"x10" cardstock long-ways with the edge of the scrap paper.
4. Put your ruler on top the your cardstock on the 7" line.
4. Put your ruler on top the your cardstock on the 7" line.
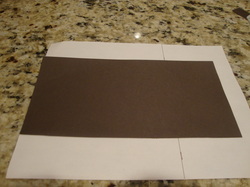 Step 3 |
 Step 4 |
5. Use your boning tool (or back of butter knife), press against your ruler and run across
the cardstock, making an indent. Flip over the cardstock and repeat on
the other side. You have should created an indent at the same location
(7" from the top of your cardstock) on both side.
6. Fold up the 3" flap.
6. Fold up the 3" flap.
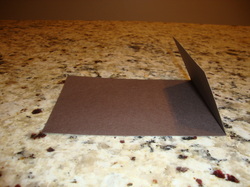
Step 6
7. Cut just a little less than 3" length of Zips glue strips.
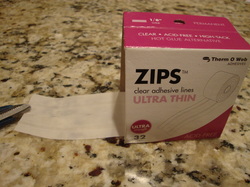
Step 7 - 1/8' wide Zips
8. Place a
glue strip on the inside of the 3" flap (as close to the edges as you
soon) on both side-edges. With the paper still on the strips, rub the
paper to adhere the strips to the cardstock. Remove the paper and fold
up the 3" flap. You should now have a 7" high by 5" wide invite with a
3" pocket on one side.
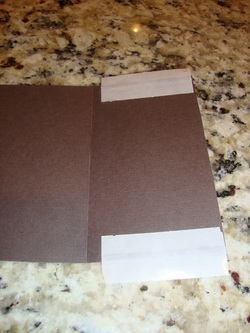 Zips placed on edge of flap |
 Paper removed; Strips on side-edges of flap 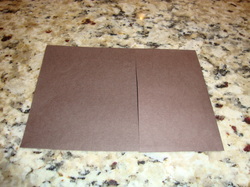 Pocket completion! |
9. Trim the side-edges of the pocked as (or if) needed with scissors.
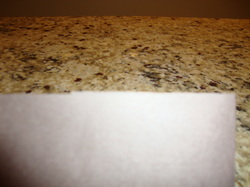
See the little edge sticking out on the top? If you have this, trim with scissors
To
adhere the main invite to the front, I lined the edge of the main
invite with glue strips. I placed the main invite just by sight.
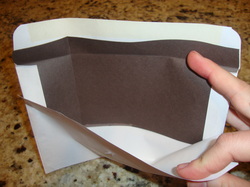
Lining Envelopes:
Supplies Needed:
-A7 envelopes (mine were tap style from lcipaper.com)
-Liner paper (I used 12"x12" scrapbook paper, another suggestion is wrapping paper)
-Double sided table
-Scissors
Note: This example used materials different from what I used for our wedding envelopes (I didn't want to confuse you when you see pink envelopes with orange/white striped paper).
To make a template for your liner:
1. Take apart one of your envelopes.
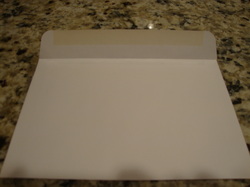 Envelope originally |
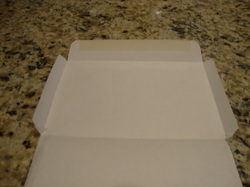 Disassembled envelope |
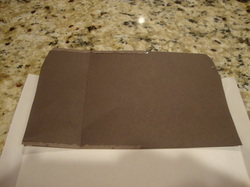
2. Place your envelope on top of your liners and trace around the envelope on your liner.

Step 2
3. Cut along your tracing to cut the liner into the shape of the envelope.
4. Measure the length of the adhesive/glue on the envelopes tab and cut that much off the end of the liner edge. (This is probably about 1/4" or so).
4. Measure the length of the adhesive/glue on the envelopes tab and cut that much off the end of the liner edge. (This is probably about 1/4" or so).
 Step 3 |
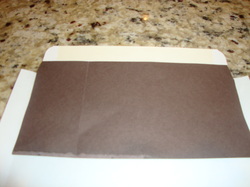 Step 4 |
5. Decide how far down you want your liner to
go in the envelope. It doesn't have to go the whole way (unless your
envelope is light/thin enough that you can see through it and could tell
if it doesn't go all the way down). My envelope was 5" high and my
liner only went about 2.5" down.
Now you can use your template to cut all of your liners to size. I did this free at Staples using their paper cutter.
To adhere the liner to the envelope, slip the liner in the envelope and line up the with envelope's adhesive line. Place a piece of double sided tape (3" long or so) on the inside of the envelope and push on the liner to adhere. Fold the liner and envelope down like you're closing the envelope. Lift up the envelope but keep the line folded down. Place a piece of tape about 5" long on the liner and fold up to touch and adhere to the envelope.
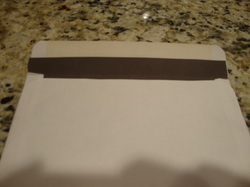 Step 5 |
 Inside of envelope with liner adhered |
Postage Stamps
I had wanted personalized stamps, but again, they were out of my budget. Luckily I stumbled upon a 40% off sale at Zazzle.com and suddenly a page of personalized stamps were less than a $1 more than a page of standard stamps. If you're interested in doing personalized stamps, definitely sign up for Zazzle's email list. They seem to offer this sale at least four time a year. I purchased the medium size. I liked them, but they seemed huge! I ordered the small for our thank you cards (I lucked out and they were on sale then also) and liked the small size much better.
All in all, I loved my invitations and they were approximately $3.25 each, including postage and RSVP postage!!
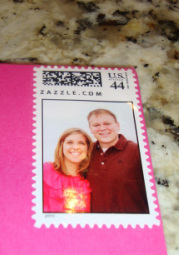
Our personalized stamps...I swear we didn't plan on wearing our wedding colors for our e-pics, but it just worked out that way!
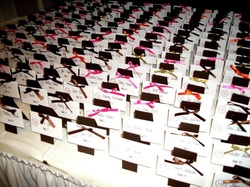
Escort CardsEscort cards (as opposed to place cards) are generally placed outside of the dining area and are arranged in alphabetical order. The card itself has the guest's name and assigned table number.
I wanted something unique for our escort cards, but knowing we'd need ~200, it couldn't be too crazy or expsensive. At the time I was starting to use Vista Print often and then one day it came to me to try to use a business card and our left over card stock for invitations to make something. In addition, I used different color ribbon to indicate entree selections. Supplies:
|
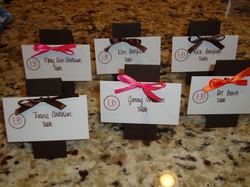 I gave the caterer the color code for the ribbon/entree selections:
 |
Ceremony ProgramsOur programs were 4"x6" booklets that included the order of the ceremony, the wedding party and a brief description of our relationships with them. I designed the programs, but my mom and several of her friends assembled them.
My mom and I made the programs. The materials used:
I had originally wanted to emboss our logo on the front, but had difficulties finding a custom stamp maker that could use my image since the resolution wasn't great. In the end, using the leftover labels was a lot quicker and essentially free because the labels would have gone to waste otherwise! Also, since Michaels didn't have enough of the cover cardstock, I also purchased some printed "regular" weight 12"x12" scrapbook paper and glued 2 sheets together so that the cover was thicker, and the interior of the cover was a nice paper and not just the white backing. (I hope that makes sense to you!) |
We had 180 confirmed guests (including children) and made 105 programs. We had about 10 left over. We didn't have anyone passing out programs (we had them on the table with our signature matte), so guests weren't obligated to take one.
|
||
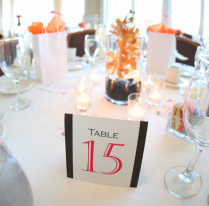
Table NumbersOriginally I wanted to do something fun with naming the tables or pictures, but in the end I simply ran out of time.
I designed them in Power Point and printed on 80# ivory cardstock (from Staples, same cardstock as programs). The file is formatted to print 2 numbers per one sheet. Then just cut the sheet in half (long-ways) and fold. I glued the number a piece of 5"x10" 80# brown cardstock folded half to be a 5"x5" tent (the cardstock was leftover from my invitations). In the end, I loved their simpleness! |
 |
||
Cake TopperI wanted a cake topper, but thought it'd be weird to do an "H" since both Hannah and our last name start with "H". For a while I was settled on just using flowers and then I had the idea, why not try to make our logo into a cake topper?
I put out an alchemy on etsy.com (Basically a custom request for someone to make you something. I named the design, size, material, and price) and after several bids, I selected CustomMadeStuff as my vendor. Steve was great and the cake topper ended up being just what I wanted. After receiving the wood cake topper, I picked out acrylic paint in our colors from Michaels and went to town painting it. I then used plain old super glue to assemble the topper. The finished product cost about $23. Thanks to a suggestion by a fellow Knottie, now that the wedding is over, I plan on cutting off the legs and putting it in a shadow box. |
 As recieved from etsy |
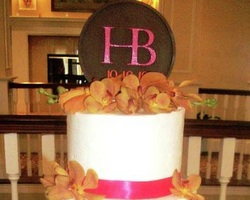
Finished Topper
Thank You Cards
These were designed and ordered from Zazzle.com, along with more custom postage
 The front (with our name blanked out) 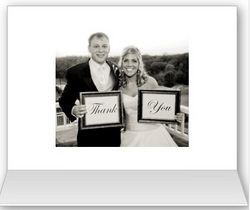 Inside |
 Back  Stamp |
